Set up in 5 minutes.
Install, connect your ESP, drop in the wishlist block. No theme code, no developer needed.
1. Install WishList Ninja
Add WishList Ninja to your store from the Shopify App Store (or your install link). Approve the permissions — WishList Ninja needs read access to products, customers and orders to keep wishlist data accurate.
2. Connect Klaviyo
In the WishList Ninja dashboard, paste your Klaviyo Private API Key (Klaviyo → Settings → API Keys → Create Private API Key with full access). Save. Wishlist count, value and alert flags now sync to every matched customer profile.
3. Connect Mailchimp
Paste your Mailchimp API Key (Mailchimp → profile icon → Account & billing → Extras → API keys) and your Audience ID (Audience → Settings → Audience name and defaults). That's it — WishList Ninja creates its merge fields in your audience automatically on the first sync. Nothing to set up by hand.
| Merge field | What it holds |
|---|---|
WL_COUNT | Items currently saved |
WL_VALUE | Total value of saved items |
WL_ACTIVE | YES while anything is saved and unbought |
WL_PD | YES when a saved item's price has dropped |
WL_BIS | YES when a saved item is awaiting restock |
3b. Connect Omnisend
Paste your Omnisend API key (Omnisend → Store settings → Integrations & API → API keys). Wishlist count, value and an active-wishlist flag sync to every contact as custom properties, and the seven wishlist events fire as Omnisend custom events you can use as automation triggers. Full guide on the Omnisend integration page.
4. Add the wishlist to your store
Open your theme editor. Under App embeds, toggle WishList Ninja drawer on (adds the header heart + slide-out drawer). Then on your product template, Add block → WishList Ninja heart. No code changes — it's a Theme App Extension served from Shopify's CDN.
5. Use the data
In Klaviyo, build a segment on wishlist_value > 150 or has_active_wishlist is true. Trigger a flow on wishlist_price_drop_pending. The properties update live as customers save items and as they buy them.
6. Build flows & automations
Trigger emails on wishlist activity. Each of the seven triggers maps to one Klaviyo flow or Mailchimp journey:
| Trigger | Klaviyo metric | Mailchimp event |
|---|---|---|
| Added to wishlist | Added to Wishlist | added_to_wishlist |
| Price drop & sale | Wishlist Item Price Drop | wishlist_price_drop |
| Low stock | Wishlist Item Low Stock | wishlist_low_stock |
| Back in stock | Wishlist Item Back in Stock | wishlist_back_in_stock |
| Saved a collection | Saved a Collection | saved_a_collection |
| New items in a saved collection | New Items in Saved Collection | new_items_in_saved_collection |
Full step-by-step — with example emails, the dynamic content tags and screenshots — in the Klaviyo flows guide and Mailchimp flows guide below.
Build your Klaviyo flows
Seven wishlist triggers, one flow each — here’s the exact setup and the dynamic tags to drop into your emails.
- 1Create the flow
Klaviyo → Flows → Create Flow → Create From Scratch. Name it, e.g. “Wishlist price drop”.
- 2Set the trigger
Pick Metric as the trigger, then choose the wishlist metric from the table below.
- 3Add an email
Add an Email action under the trigger and open the editor.
- 4Add dynamic content
Use the event tags below for the exact product, price and links — e.g. set an image block’s source to
{{ event.product_image }}and a button link to{{ event.product_url }}. - 5Go live
Switch the flow from Draft to Live.
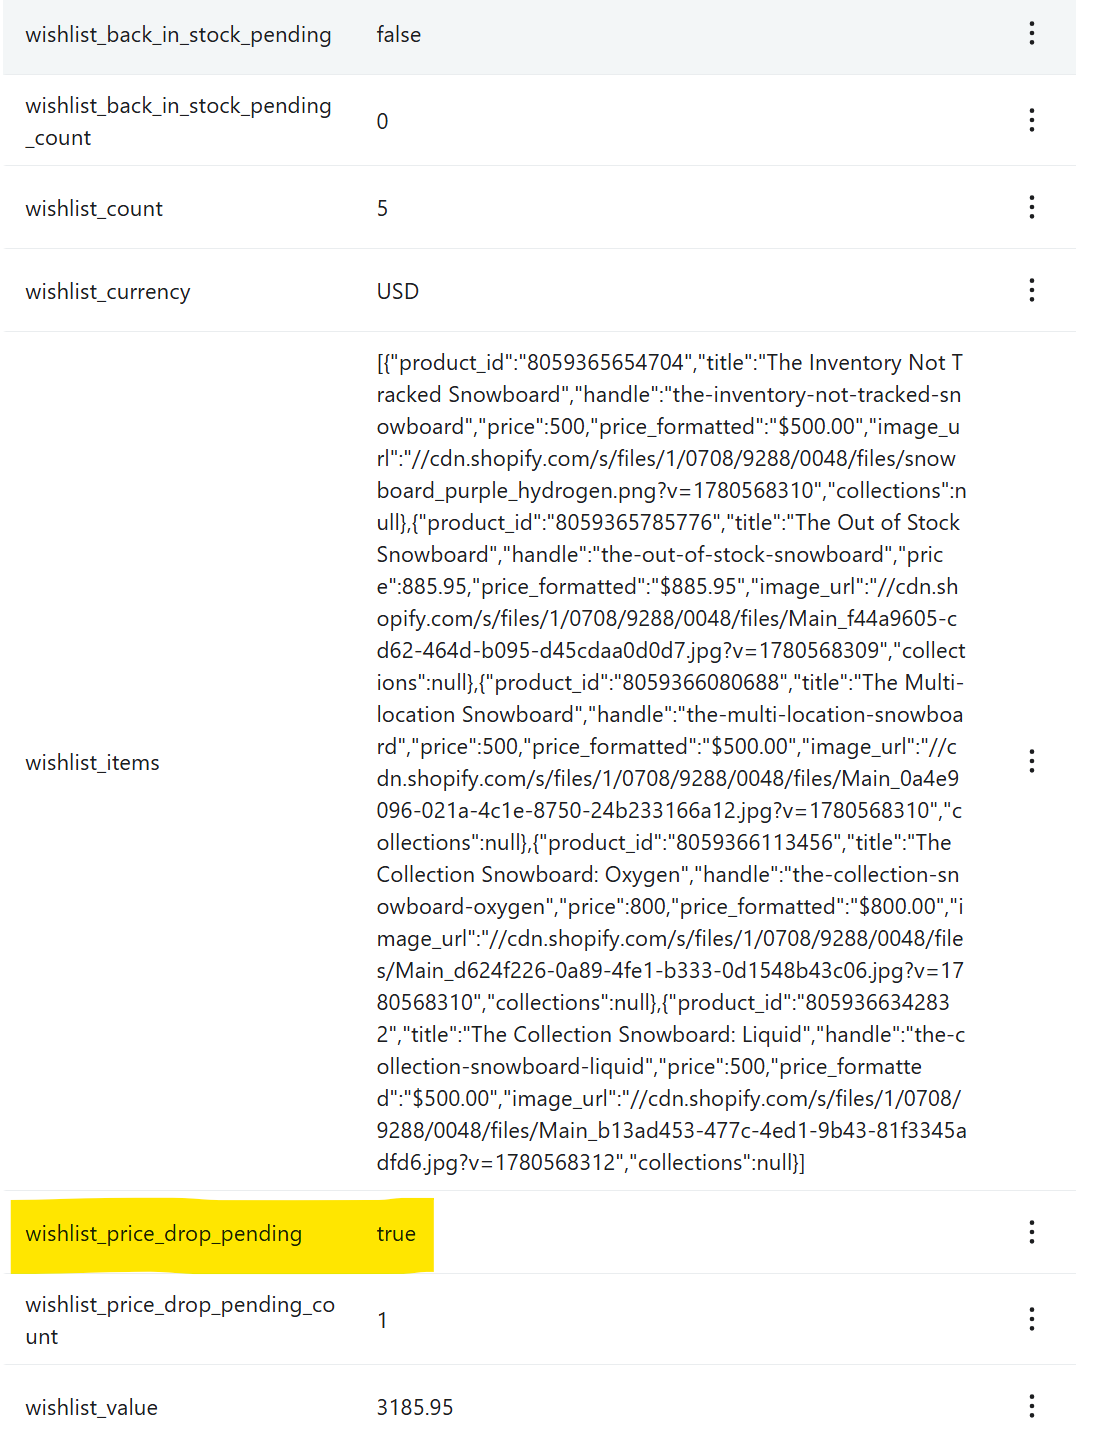 Live wishlist data on every Klaviyo profile — segment and trigger on this.
The 7 triggers
| Wishlist trigger | Klaviyo metric |
|---|---|
| Added to Wishlist | Added to Wishlist |
| Price Drop & Sale | Wishlist Item Price Drop |
| Low Stock | Wishlist Item Low Stock |
| Back in Stock | Wishlist Item Back in Stock |
| Saved a Collection | Wishlist Collection Saved |
| New Items in a Saved Collection | Wishlist Collection New Items |
Dynamic content for your emails
| Tag | Shows |
|---|---|
{{ event.product_name }} | The product they saved |
{{ event.product_image }} | Product image — use in an image block |
{{ event.product_url }} | Link to the product |
{{ event.price_formatted }} | Price with symbol, e.g. $400.00 |
{{ event.currency_symbol }} | Just the symbol ($ €) |
{{ event.collections }} | Collection name(s) the product is in |
{{ event.manage_wishlist_url }} | One-click “manage your wishlist” link |
{{ event.old_price_formatted }} · {{ event.new_price_formatted }} · {{ event.drop_percent }} | Price Drop & Sale flow only (covers sales / compare-at discounts) |
{{ event.stock_remaining }} | Low Stock flow only |
{{ event.stock_now }} | Back in Stock flow only |
{{ event.collection_name }} · {{ event.collection_url }} · {{ event.new_items_count }} | Saved a Collection & New Items in a Saved Collection flows |
{{ person.wishlist_count }} · {{ person.wishlist_value }} · {{ person.has_active_wishlist }} | Profile data — for segments & conditions |
The flow emails, built for you
Each email built in Klaviyo, with the copy & tags to recreate it.
{{ event.product_image }}; button link → {{ event.product_url }}; footer → {{ event.manage_wishlist_url }}.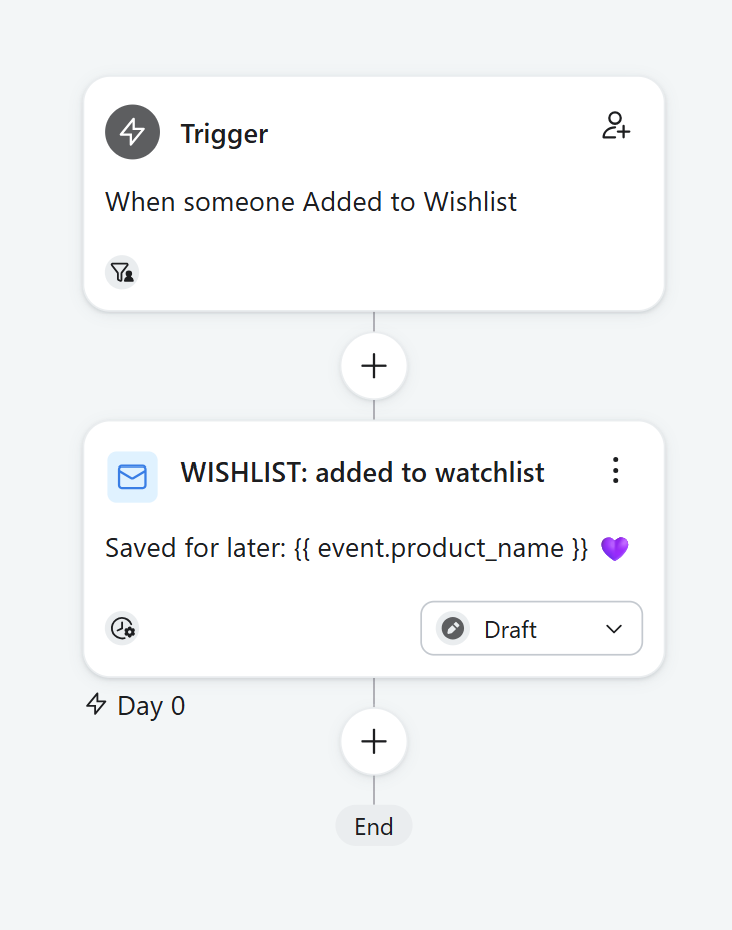
{{ event.product_url }}.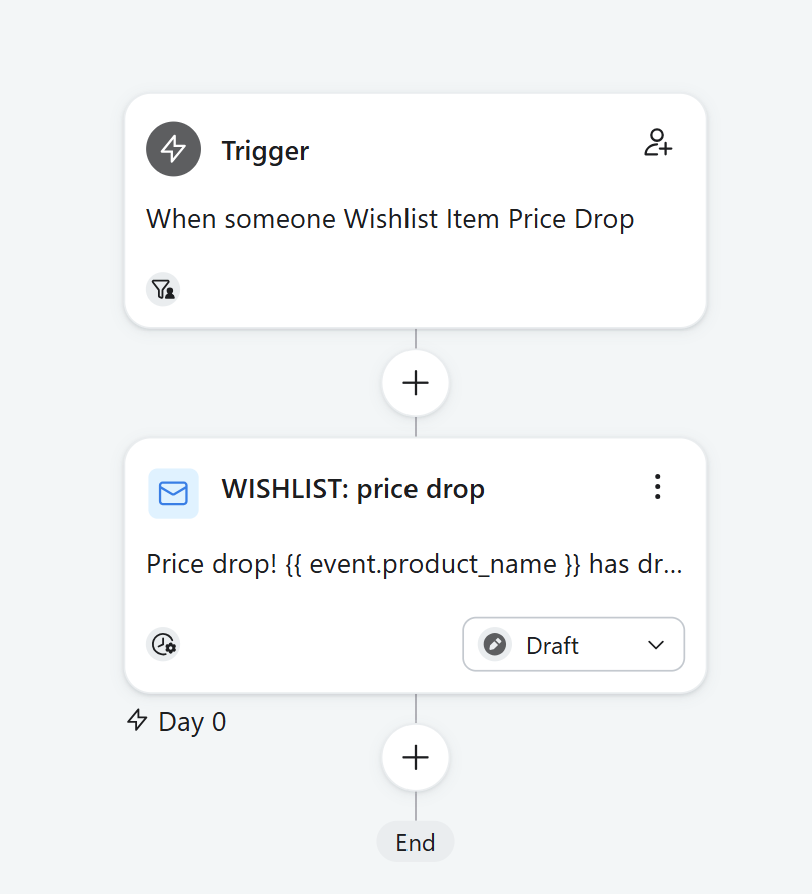
{{ event.product_url }}.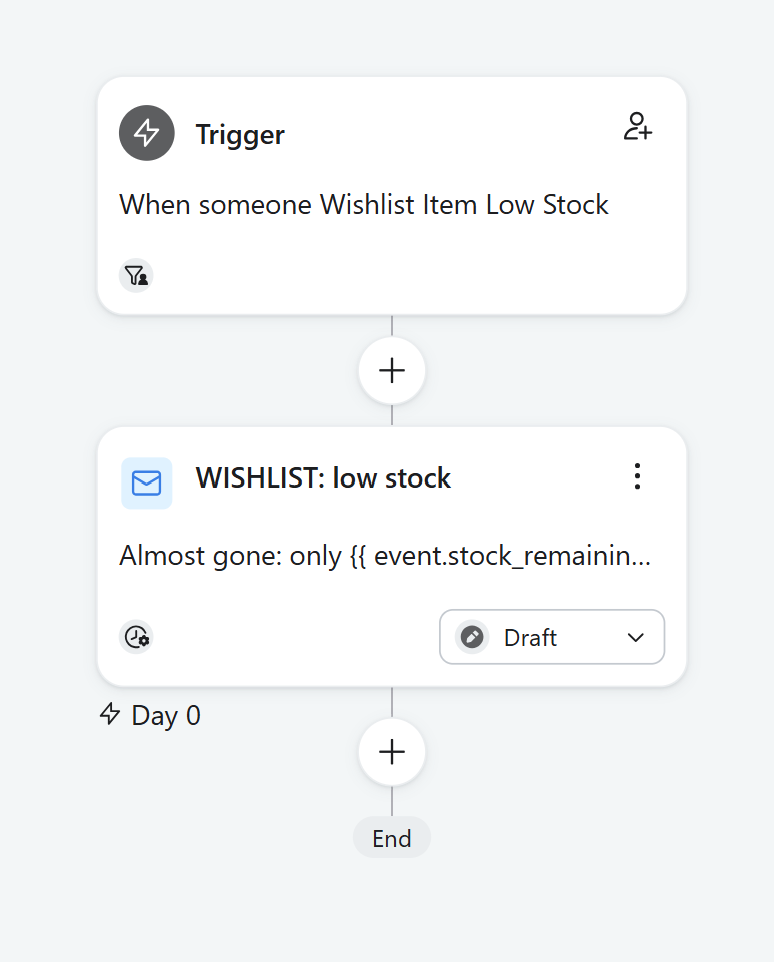
{{ event.product_url }}.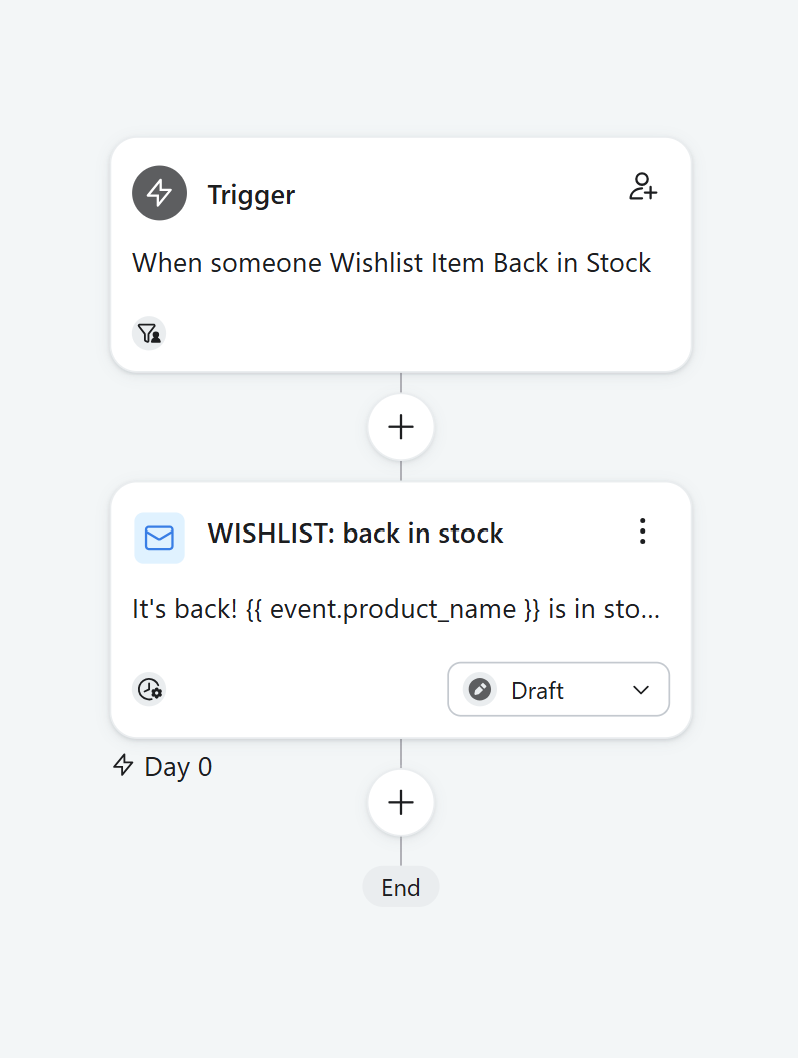
{{ event.collection_url }}.
{{ event.collection_url }}.
Segments & newsletter blocks
The same wishlist data powers Klaviyo segments and a personalised block in your regular newsletters — show it only to shoppers who have a wishlist:
{% if person.has_active_wishlist %}
You’ve saved {{ person.wishlist_count }} item(s) worth {{ person.wishlist_value_formatted }}. [ button → their wishlist ]{% else %}
Found something you love? Start your wishlist…{% endif %}
Because has_active_wishlist is live true/false on every profile, just set a block’s conditional display to show only when has_active_wishlist is true — and a “start a wishlist” block for when it’s false. No Liquid.
 Show the wishlist block only when has_active_wishlist is true — set it in the block’s display rules.
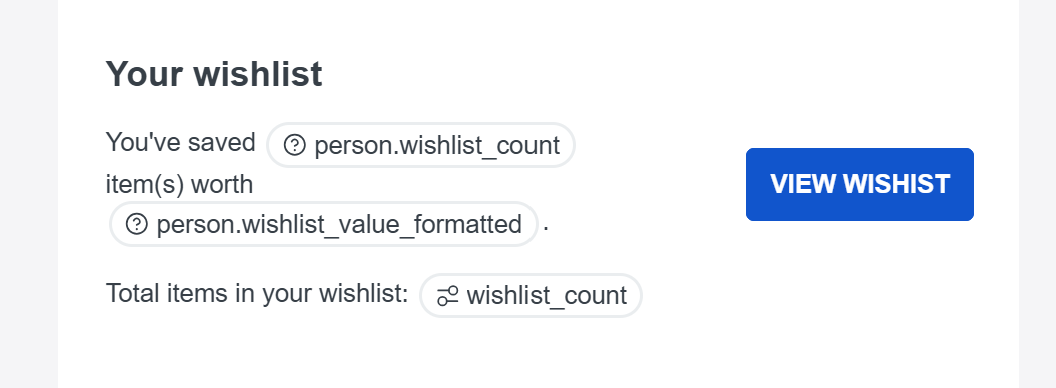 The block, built in your newsletter.
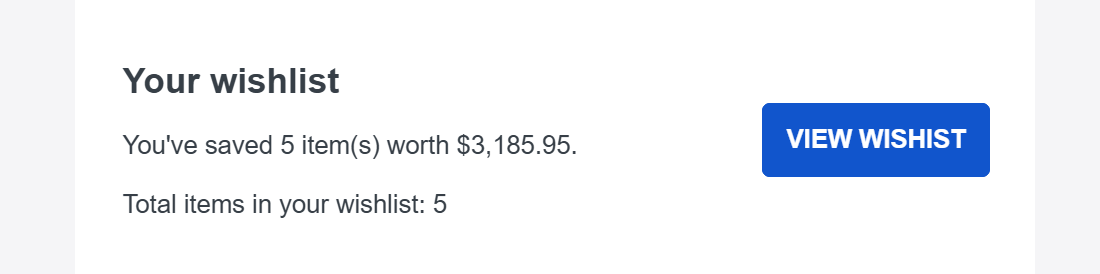 How it renders for a shopper with saved items.
Build your Mailchimp flows
Seven wishlist triggers, one flow each — here’s the exact setup and the dynamic tags to drop into your emails.
- 1Create the journey
Mailchimp → Automations → Customer Journeys → Create. Name it.
- 2Set the starting point
Choose API & Integrations → Event API, then set the event name from the table below.
- 3Add a Send-email step
Add a Send email step after the trigger and design the email.
- 4Personalise
Use the merge fields below, plus conditional blocks to show sections only to active wishlisters.
- 5Turn it on
Switch the journey On.
The 7 triggers
| Wishlist trigger | Mailchimp event name |
|---|---|
| Added to Wishlist | added_to_wishlist |
| Price Drop & Sale | wishlist_price_drop |
| Low Stock | wishlist_low_stock |
| Back in Stock | wishlist_back_in_stock |
| Saved a Collection | wishlist_collection_saved |
| New Items in a Saved Collection | wishlist_collection_new_items |
Dynamic content for your emails
Mailchimp emails are kept generic and link the shopper to their wishlist (where they see exactly what changed). Personalise with these merge fields:
| Merge tag | Shows |
|---|---|
*|WL_URL|* | Link to the shopper’s wishlist — your main CTA |
*|FNAME|* | First name (subject + body) |
*|WL_COUNT|* · *|WL_VALUE|* · *|WL_CURR|* | Saved count, value, currency symbol |
*|WL_ACTIVE|* · *|WL_PD|* · *|WL_BIS|* | Active / price-drop / back-in-stock flags |
Link any button to *|WL_URL|* — e.g. “See your wishlist →”. It opens the shopper’s saved items so they see exactly what dropped or restocked.
*|IF:WL_ACTIVE=YES|* …your “saved items” block… *|ELSE:|* …a “start a wishlist” prompt… *|END:IF|*
Why generic? Mailchimp emails can’t reliably carry per-event product data, so we keep them simple and send shoppers to their wishlist. For per-product emails (image, price, exact item) inline, Klaviyo is the deeper integration.
The flow emails, built for you
Each email built in Mailchimp, with the copy & tags to recreate it.
*|WL_URL|* (“See your wishlist”).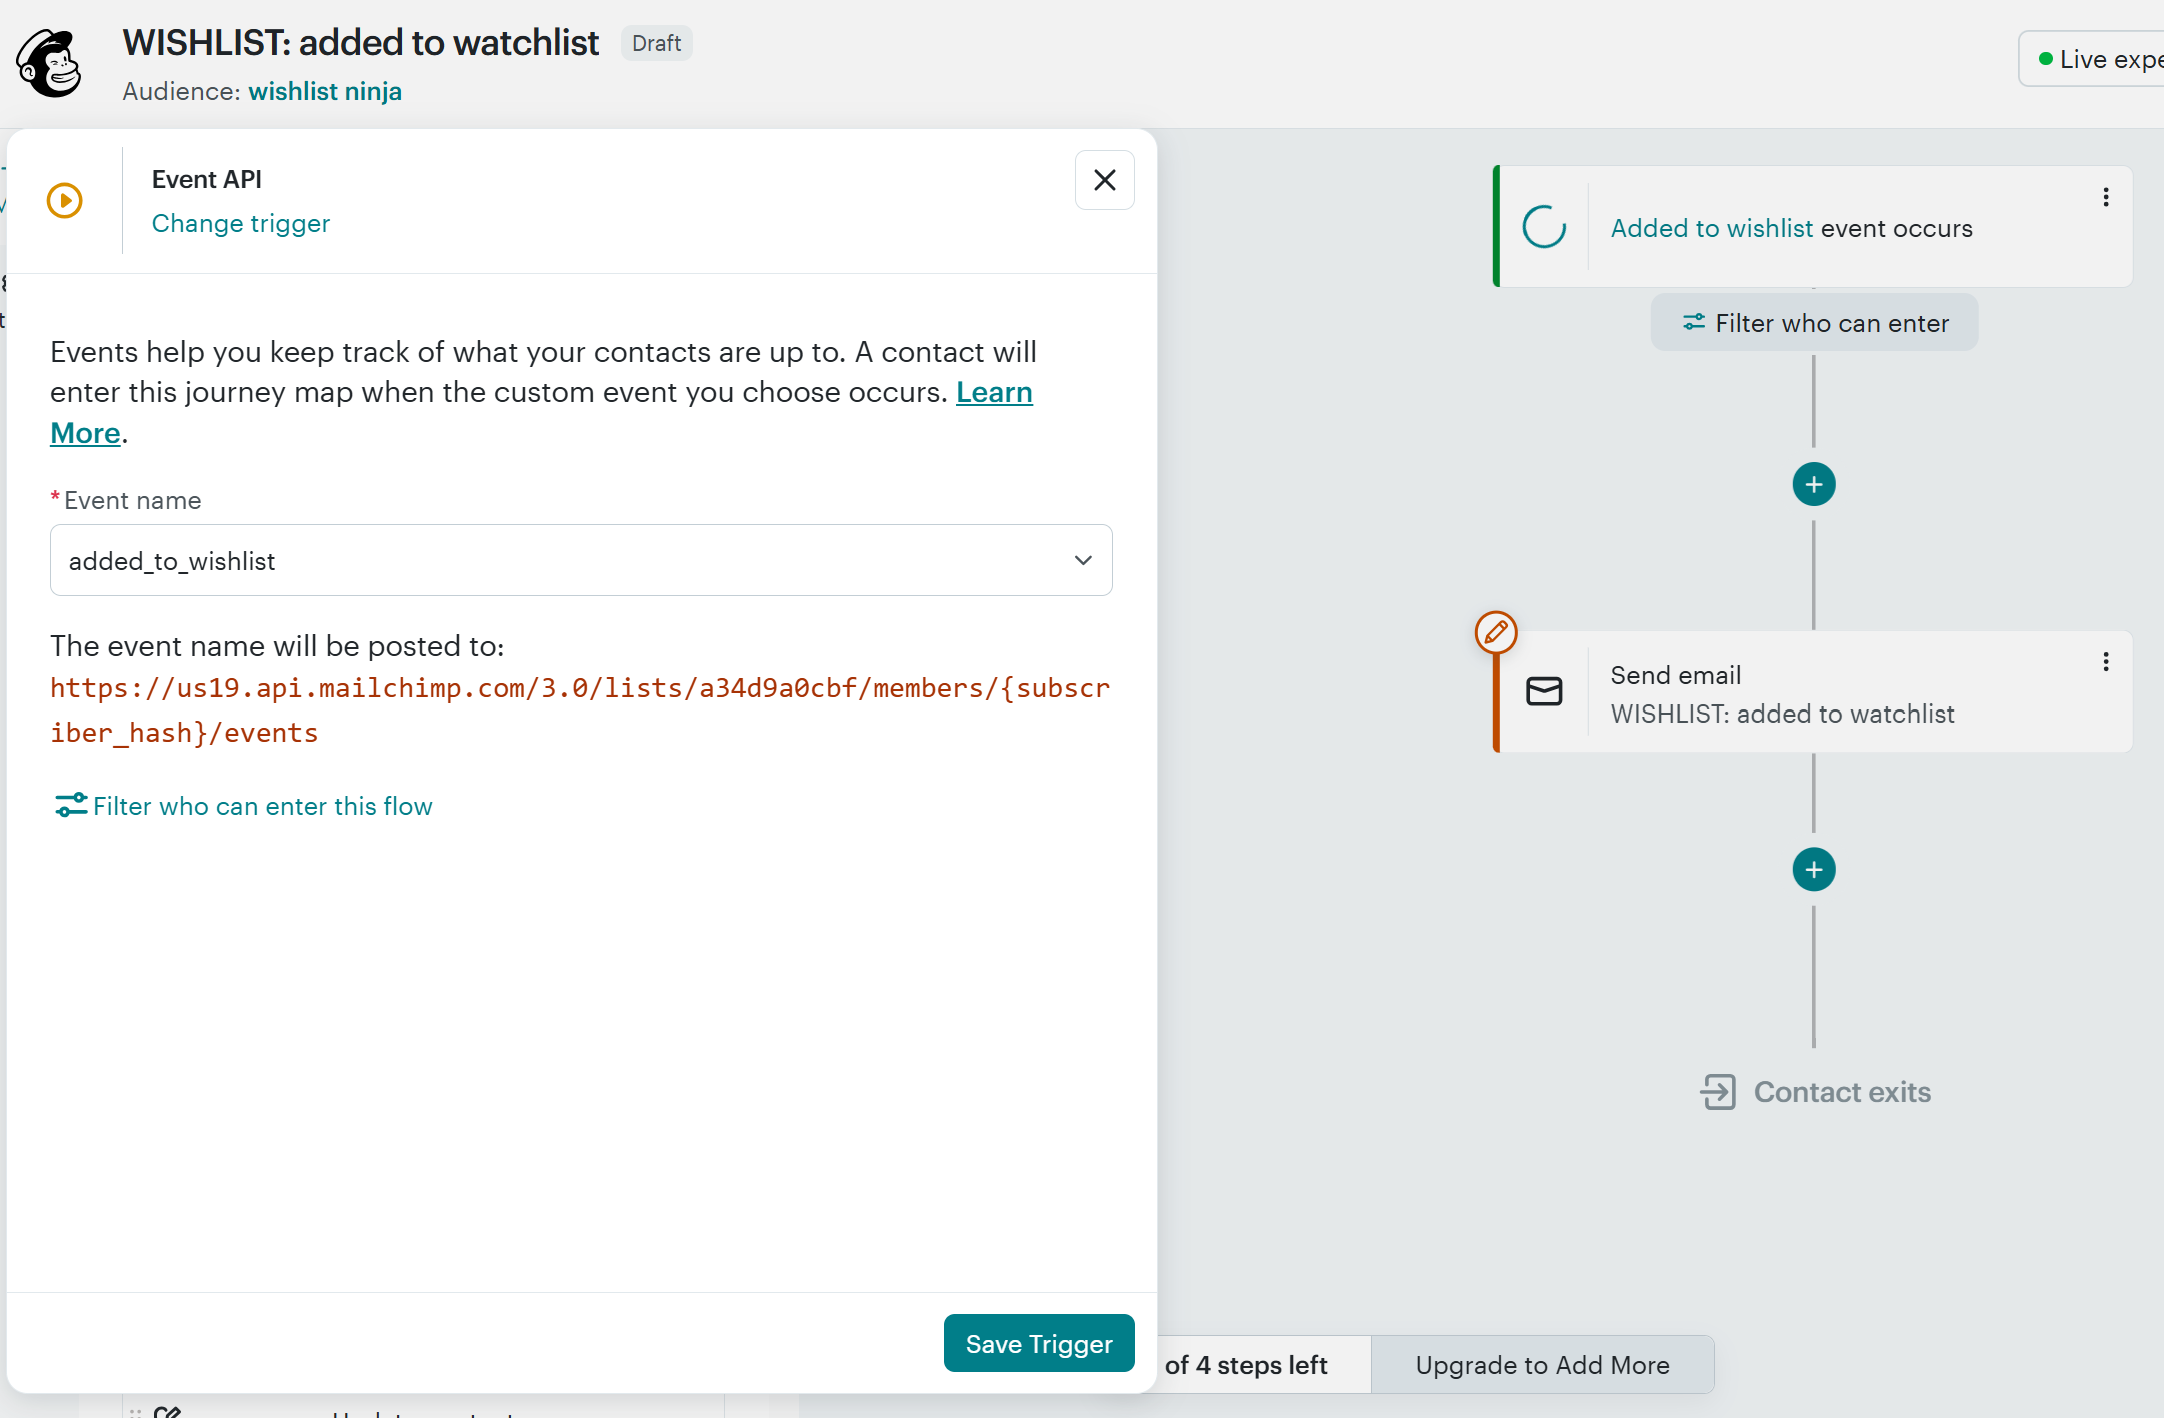
*|WL_URL|* (“See your wishlist”).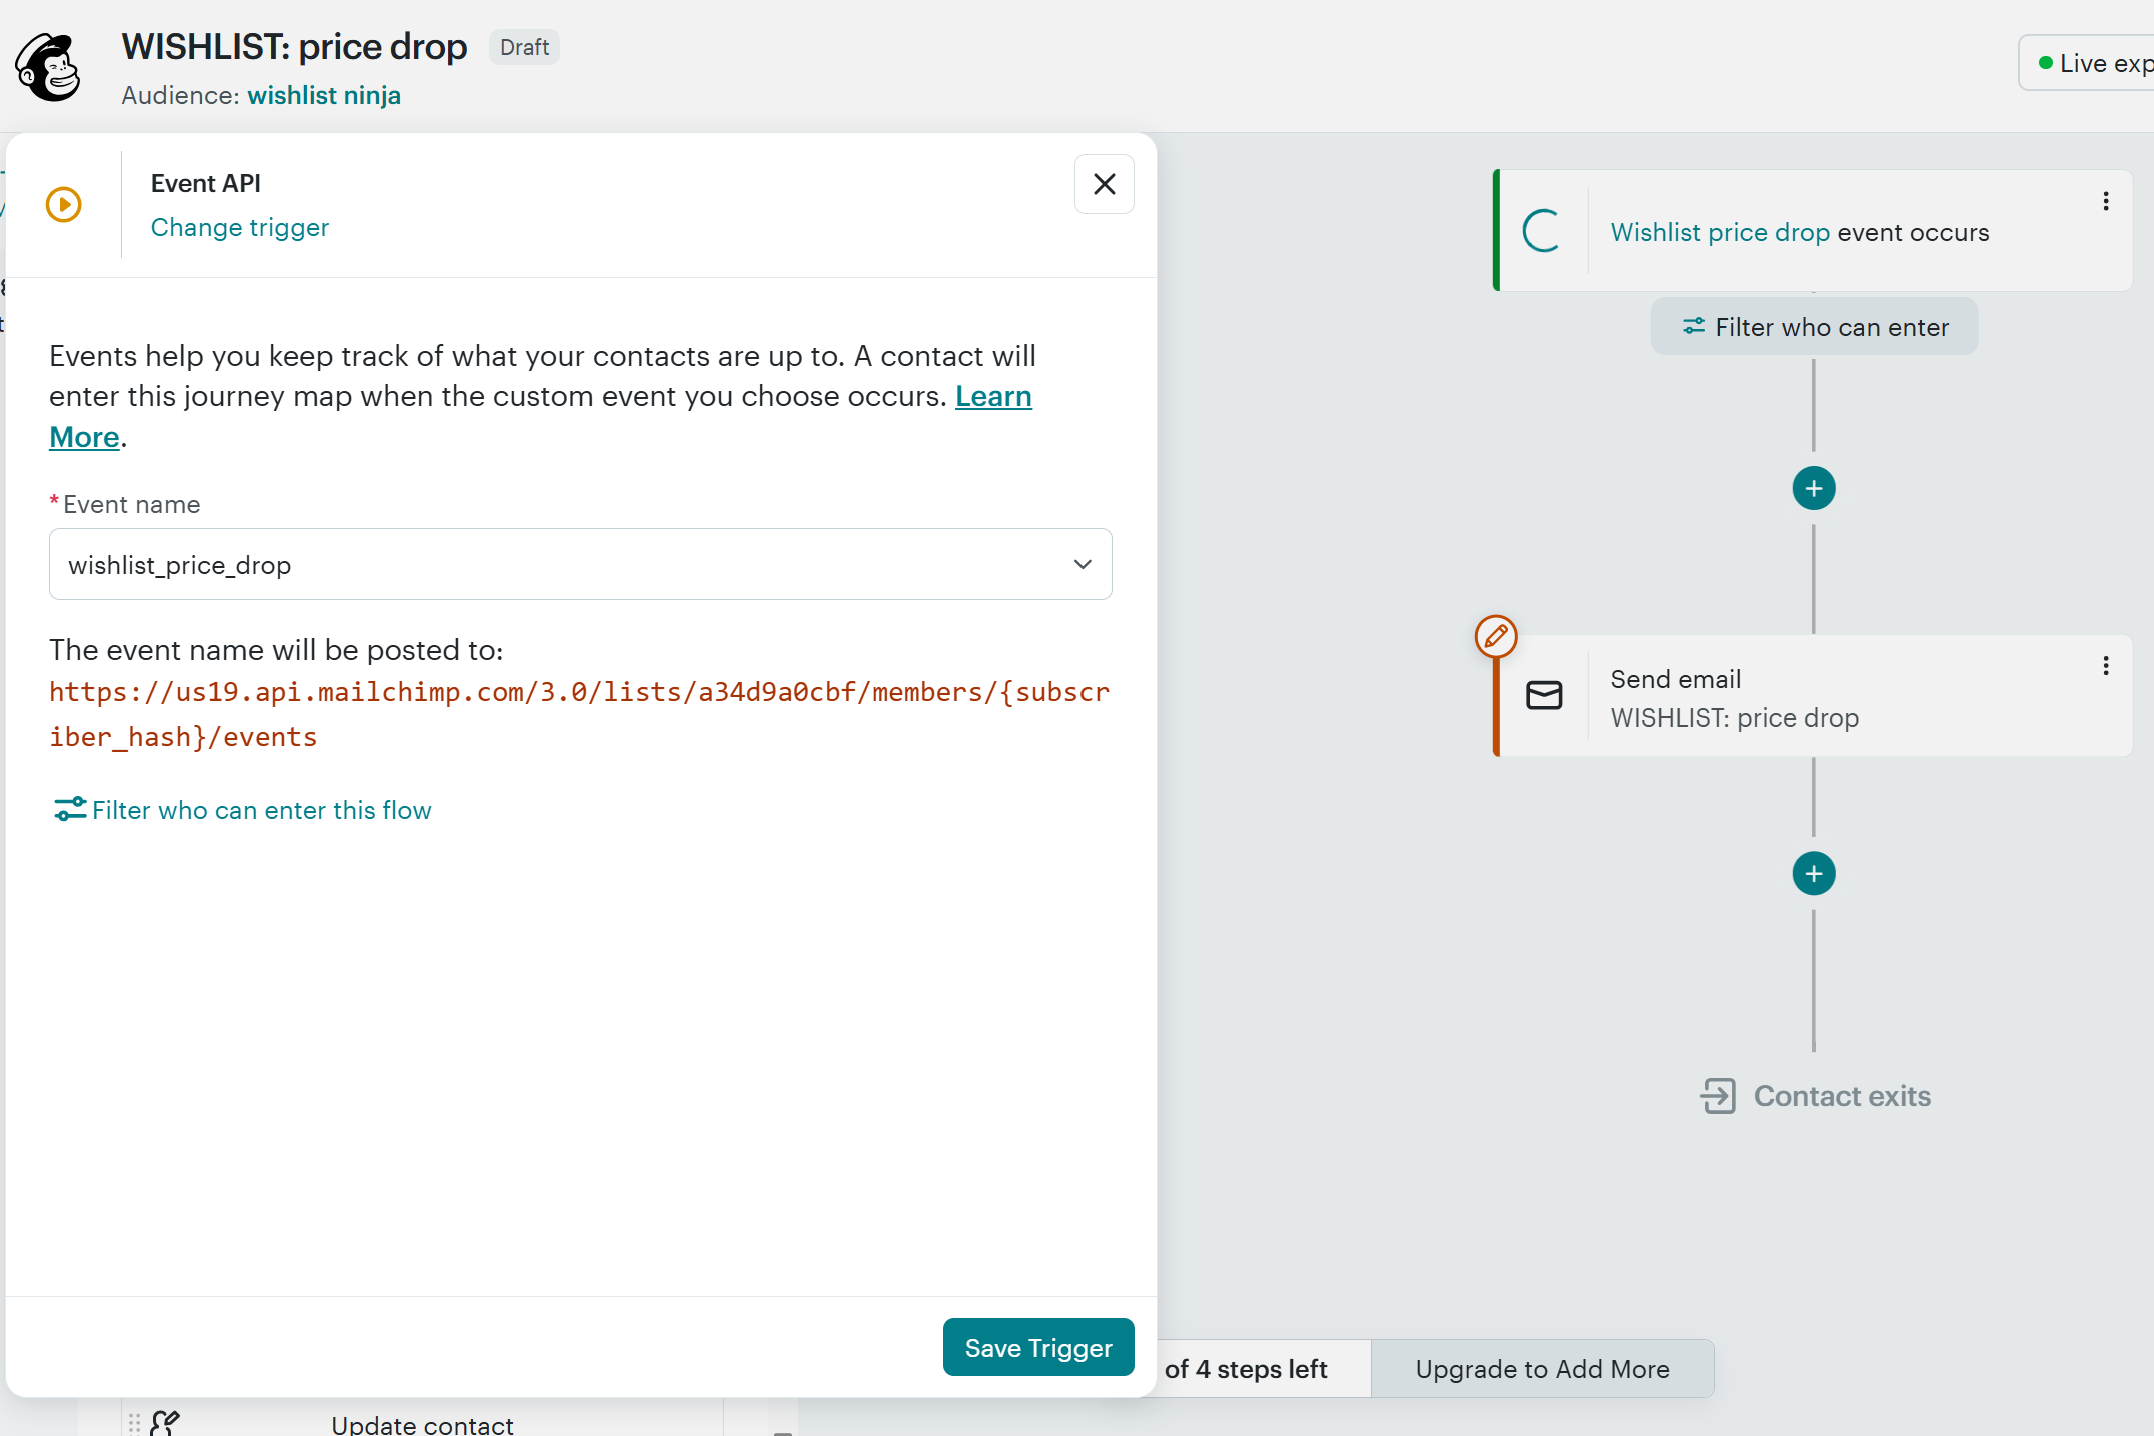
*|WL_URL|* (“See your wishlist”).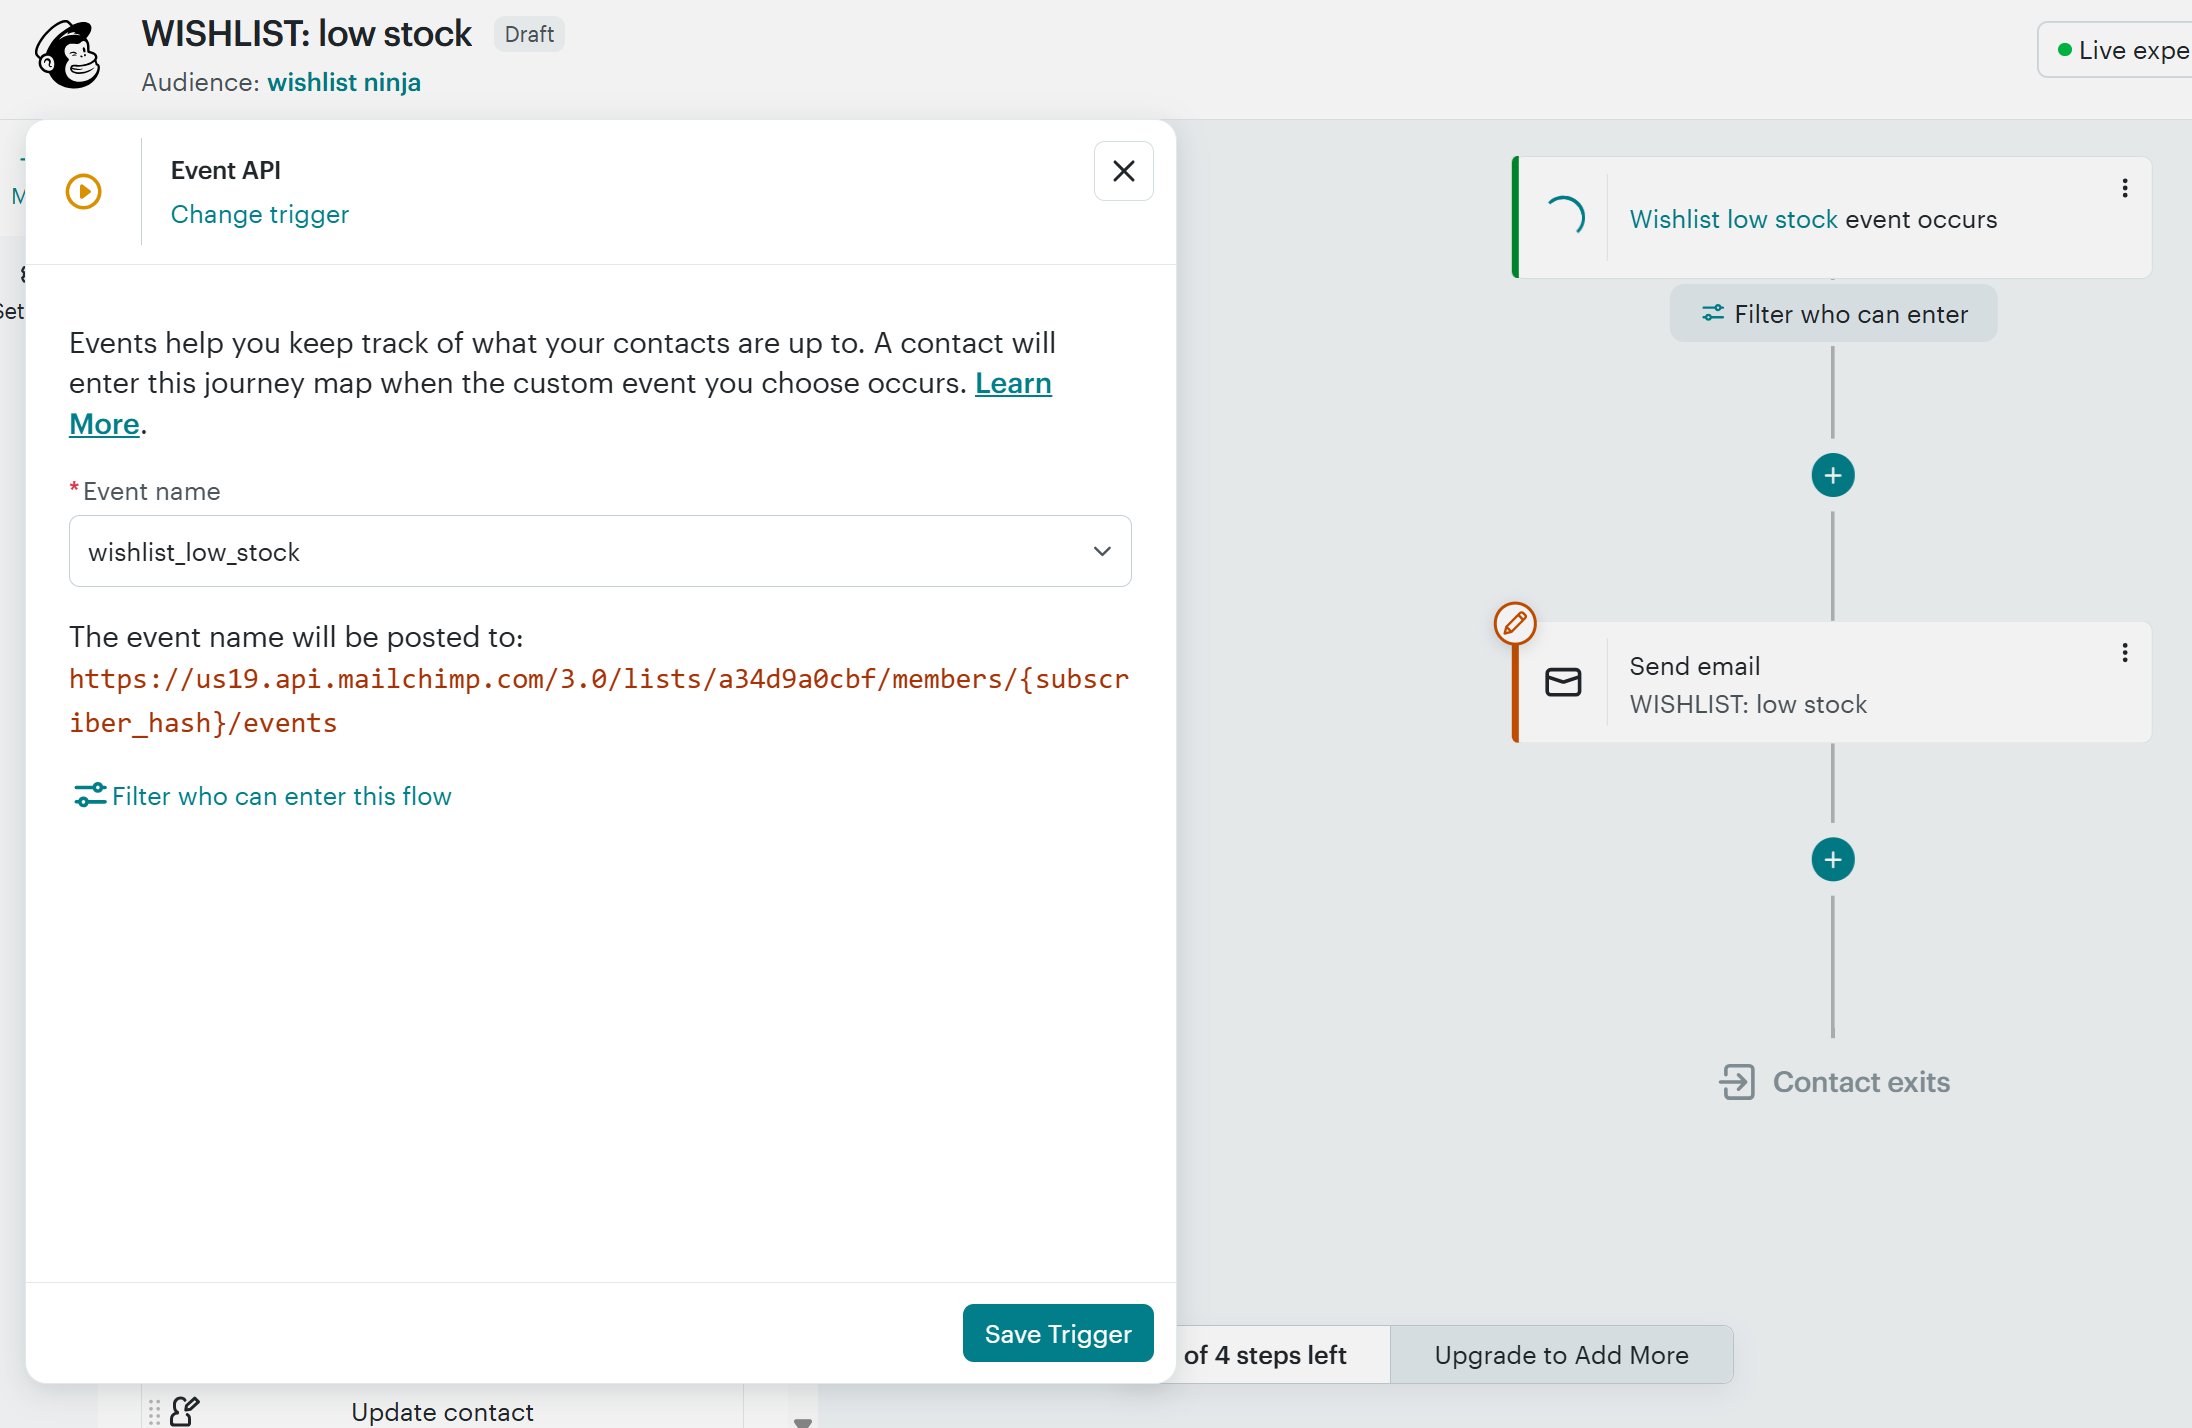
*|WL_URL|* (“See your wishlist”).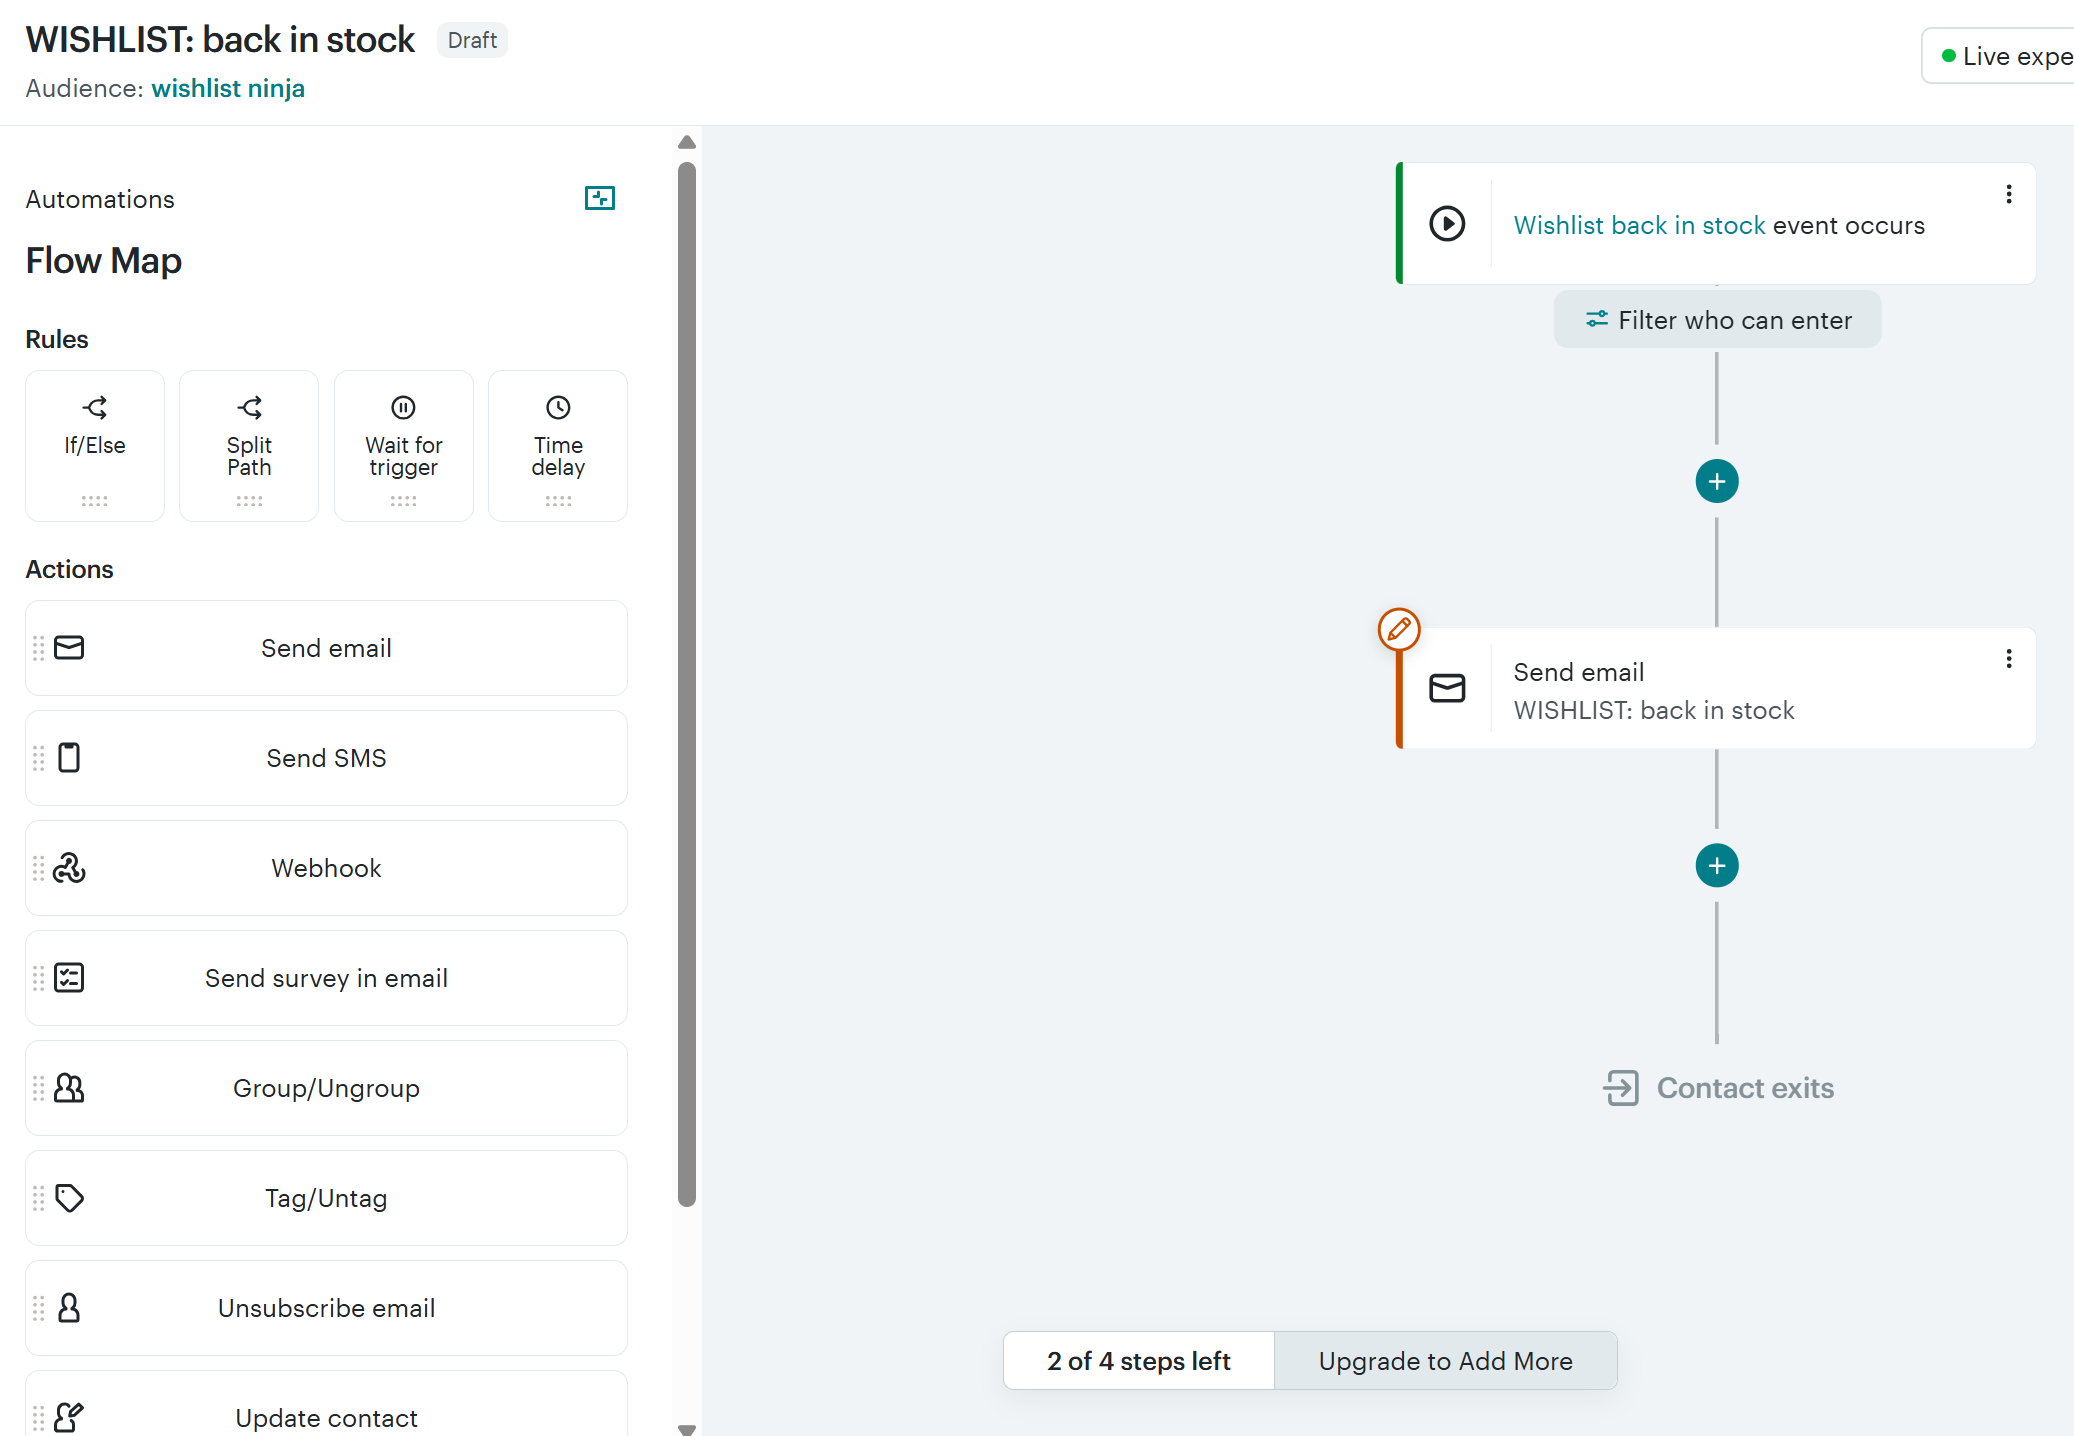
*|WL_URL|* (“See your wishlist”).
*|WL_URL|* (“See your wishlist”).
Segments & newsletter blocks
The same wishlist data powers Mailchimp segments and a personalised block in your regular newsletters — show it only to shoppers who have a wishlist:
*|IF:WL_ACTIVE=YES|*
You’ve saved *|WL_COUNT|* item(s) worth *|WL_CURR|**|WL_VALUE|*. [ button → *|WL_URL|* ]*|ELSE:|*
Found something you love? Start your wishlist…*|END:IF|*